

For a small project, I decided to look at the new Laravel Splade, which seems promising.
My application is a typical CRUD one. Therefore, the integrated Datatable, forms and Blade-based VueJS components raised my interest.
In this post, I will not write about the pros of Laravel Splade. I will write only about the difficulties I encountered and how I circumvented them.
I am still at the beginning of the development, therefore this post will be updated regularly.
UI issues
A typical problem of boilerplates & starter kits is the lack of good UI components. This is the BIG issue with Laravel Jetstream for instance, despite the fact it can be mitigated by installing a good UI library like PrimeVue on top of Jetstream.
After a few minutes of development with Splade, I noticed two annoying issues.
- The Link component is unstyled. I am not sure it should be styled, however. But intuitively, this is what I expected. Everything is clean when you first log in to a brand new Splade application, so you expect some facilities to develop your pages. I wonder why the form elements are styled, but the Links are not.
- A simple Button component acting as a link is not available. In my case, I needed to add a “Cancel” button to a form. This is not a no-brainer: you’ll have to style a link with CSS/Tailwind.
For the second issue, I decided to take 20 minutes to implement a custom component. I created this code in /resources/js/Components/href-button.vue:
<template>
    <div>
        <button @click.prevent="redirect()"
            class="rounded-md shadow-sm bg-gray-500 hover:bg-gray-700 text-white py-2 px-4 focus:outline-none focus:shadow-outline">
            {{ label }}
        </button>
    </div>
</template>

<script setup>
import { inject } from 'vue'
const props = defineProps({
    href: {
        type: String,
        required: true
    },
    label: {
        type: String,
        required: true
    }
})
const Splade = inject("$splade")

function redirect() {
    Splade.visit(props.href)
}

</script>
Once the file has been added, you have to add this component by editing the app.js file:
import "./bootstrap";
import "../css/app.css";
import "@protonemedia/laravel-splade/dist/style.css";
import HrefButton from "./Components/href-button.vue";

import { createApp } from "vue/dist/vue.esm-bundler.js";
import { renderSpladeApp, SpladePlugin } from "@protonemedia/laravel-splade";

const el = document.getElementById("app");

createApp({
    render: renderSpladeApp({ el })
})
    .use(SpladePlugin, {
        "max_keep_alive": 10,
        "transform_anchors": false,
        "progress_bar": true,
        "components": {
            HrefButton
        }
    })
    .mount(el);
Then it can be used like this:
<x-splade-form :default="$site" class="flex flex-col gap-4">
   <x-splade-input label="URL" name="url"/>
   <x-splade-select name="niche" :options="$niches" label="Niche"/>
   <x-splade-input label="Google request" name="google_request"/>
   <x-splade-input type="number" label="Position" name="position"/>
   <div class="flex gap-4">
       <HrefButton label="Cancel" href="/niche_sites"/>
       <x-splade-submit label="Save"/>
   </div>
</x-splade-form>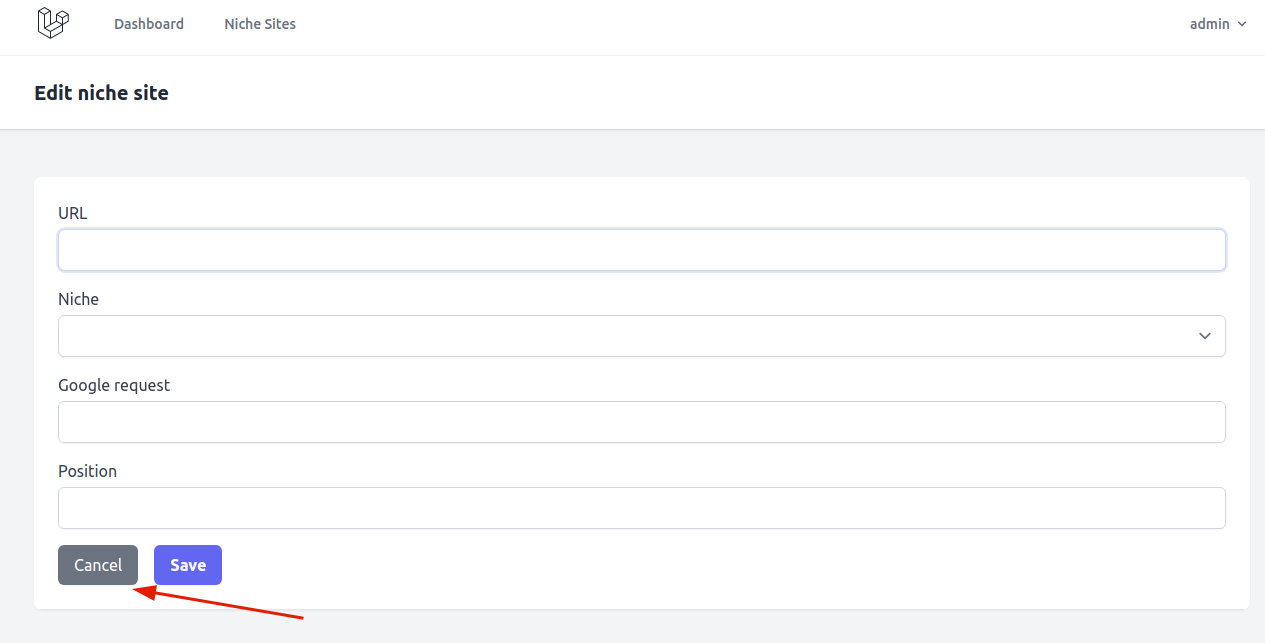
There is no difficulty: it just works, and everything is well-explained in the docs. But it takes precious minutes for a simple component that could be added by default in Laravel Splade.
Leave a Reply